Creating a Mixed Media Card
NEW - Mixed Media Monday ( New as in, I have never done this before ).
Mixed Media Monday was slightly more successful than I had imagined! It was Monday after all… and I figured what could possibly go right on a Monday?!
I have no skills in this artful adventure, not really any of the supplies required, and well quite honestly I simply didn’t have a clue what I was doing.
What could go wrong?! :)
What seemed to be one of the most important things for me was nailing down a focal point. I’d need to know what my focal point was going to be. What’s the purpose of the card? That could be wrong in that I’m not sure if mixed media is supposed to be actually planned. It seems like it is more of a haphazard art in which somehow combining all of the mediums and elements turns into a truly beautiful result.
I must say, it was definitely a freeing experience to not be quite so focused on the need for every application or process to be perfect. To let the creativity go in whatever direction it led me.
The next biggest question in my mind was a background and colors. I knew I was going to use the traditional ink smooshing technique for a background since I am quite familiar with that. This way I could fool myself into thinking I had somewhat of a clue where I was going with this project.
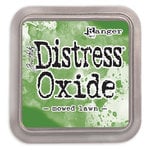
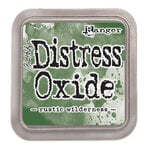
So colors, I needed to choose what colors were going to work best for my intended creation. Well… green is my favorite color, no doubt about it, so it seemed safe to start with that. I chose these 2 distress ink oxides which I was favoring, however there seems to be this rule of 3 and I was somewhat aware that I was going to need a contrasting color that I would apply after the initial green smooshing had been applied to the paper.
After dabbing a mixture of the green inks onto my glass mat and giving that a few slight sprays of water, the inks seemed to form a bit of yellow tone in some places before even adding the paper to the this recipe. I dabbed ( or smooshed ) my paper into the ink and water based puddles a few times and pleasantly I was seeing that a yellow toned highlight seemed to be forming in places on it’s own. Therefore, I did not use a 3rd color for the next round of background since I quite liked the result I had already. (This doesn’t usually happen). It seemed I had about 3 color features and I felt this would work quite well.
After this layer was dried, it was time to start creating some texture. I don’t have a large collection of pastes. I have some lunar paste and a grit paste. I had used a grit paste with a stencil on a practice piece earlier, and thought it turned out really neat, I simply decided I wasn’t going to use it on this piece. I was going to try it using just several layers of stamping.
Though I love the look of anything vintage, surprisingly I didn’t have much as far as vintage stamps go. I did have a couple of dollar store quality sets that had some vintage script, some postal markings, a few delicate wildflowers, and a watering can. Seemed like even though these stamps were small, these might work.
I started with with a stamp that was, I think, a ledger or receipt book and using a light grey ink and stamping off once I stamped this in a few random places.
*** I just wanted to note here that I had picked a white space ( a less prominent space that would help draw the eye to the focal point). That may have been lost? I know where it is, I’m just not sure it’s that evident to everyone else’s eye. :)
I then added some of the wildflower stamps, stamping once then moving slightly and stamping again. This lent a pretty shadowed effect to the flowers.
I knew that I would be using a die cut butterfly for my focal point on this card, so stamping a few small butterflies from the stamp set seemed justified. The butterflies were stamped in a black Memento Ink.
I still needed more layers of stamping and though I had completely intended to add some sections of script writing, I suppose this is where I forgot that addition and had focused on this “Garden” word stamp. I stamped the word a few times as well. If I could go back I would still have added the script stamp in a few spots with a stamped off Memento Black Ink.
I really wanted to get that watering can in there into the mix of layered stamps, so I added just one and stamped it just below where the die cut butterfly would be, hoping it would blend in as part of the focal point.
Onto some splatter!! I added a light splatter of white acrylic, as well as a some black watercolor splatter. Simply what was hanging about my desk. Nothing fancy. Letting the splatter dry between each layer.
As the card front was drying I started to work on the butterfly. The butterfly die cut was in my stash and I have used it before on several cards. It’s such a beautiful butterfly and there are so many ways it can be used. I chose to use just the very delicate detailed part of the die cut.
I die cut the butterfly in white - however that was just to stark. This butterfly was going to need some detail.
Using a blending brush I added some of the Rustic Wilderness around the edges of the wings. I then added Black Soot blending to the edges as well. Just enough so that he was no longer a stark white butterfly.
With a small paint brush and some metallic gold watercolor paint, I added some painted details to the butterfly. A few flecks here and there for just a tiny gold accent.
At this point I added a little water to the brush and did a few flecks of gold splatter onto the card front as well. Why not?! It was on my brush already!
The butterfly was added to the intended focal point, however I did have to use a blending brush and a little of the Mowed Lawn oxide ink onto the background for the butterfly so that it would stand out a little more.
I thought about embossing a gold sentiment on a strip of cardstock, however I opted to continue in the black Memento Ink for the greeting.
I matted this mixed media piece onto some black cardstock leaving just a slight border of black around it, just to pull all of the black elements together, seemingly.
The butterfly may have gotten slightly lost on the card front… or not?! However I simply loved the card at this point and was completely happy with my first attempt at a mixed media card.
Trust the process… well the process was super fun and I definitely intend to try it again Monday coming!!
THE LINKS IN THIS POST CONTAIN AFFILIATE LINKS - WHICH MEANS THAT IF YOU CHOOSE TO PURCHASE A PRODUCT FROM ONE OF THESE LINKS THAT I WILL MAKE A SMALL COMMISION. THIS DOESN'T COST YOU ANY EXTRA TO PURCHASE. THE SMALL COMMISION HELPS ME TO CONTINUE TO SHARE CARD IDEAS AND EXAMPLES WITH YOU. HEARTFELT THANKS FOR YOUR SUPPORT.


